|
|
It is the intention that the article help the reader to understand the components and operation of the Front Disk Brakes on a 1974 - 1978 Chrysler Newport, New Yorker or Imperial.
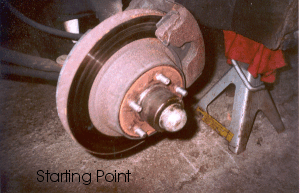
Image 1: This image shows the front end of the car safely supported by one of two jack (safety) stands. Visible is the dr. side brake assy. These are OEM parts, with the exception of the pads. I imagine the bearings were greased, possibly, twice since í78 (the car has 96,000 mi.). My main reason for doing the brake job was to replace the bearings, which I could hear make a "clunk" noise upon application of the brakes. Upon disassembly, I found the bearings were shot, and the rotors were pretty warped. BTW, the min. thickness for the rotors is supposed to be 1.180".
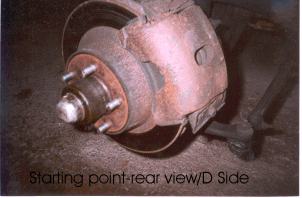
Image 2: This is a good reference shot of the rear part of the dr. side brake assy. Visible is the orig. rotor and caliper. Note how the brake design at the time was a "floating caliper design." The two screws and hardware on the caliper are all that hold it to the bracket.
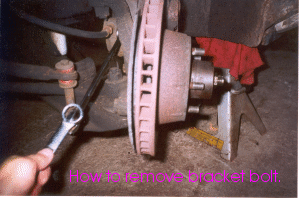
Image3: Image shows how I removed the top bracket screw. This method isnít necessary for the pass. side. It isnít necessary to remove the caliper bracket. I left the caliper on in this photo-it should be removed before attempting to remove the bracket. Be careful-the calipers on these cars are heavy. They are cast iron pieces.
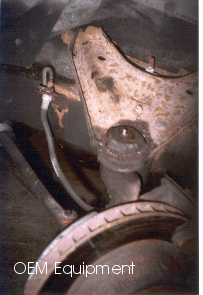
Image 4: Hereís another reference shot, dr. side.
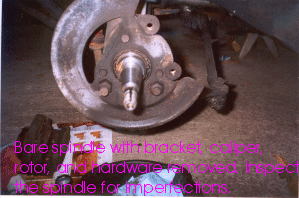
Image 5: The bare spindle is visible here, with the bracket removed. Inspect the spindle for galling, pitting, etc. Note groove (keyway) for washer tab. Make sure you keep a mental note of how these things go back together. Despite their ease of maintenance, itís easy to make mistakes, Iím sure. Notice, too, I often use those blue shop towels for wiping bearing surfaces, instead of the red ones with all the lint. ĎCourse, you could always use regular paper towels. I think Iíll do that next time!
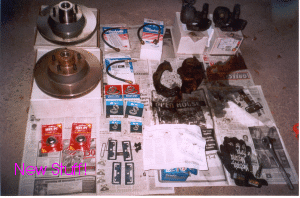
Image 6: The new parts, and some old stuff. I bought the reman. calipers from Advance Auto. They are Cardone pieces. The piston is steel. Now I know the phenolic piston calipers are probably better (they donít stick as much) but I didnít know that at the time. I ordered new Raybestos brake hoses through Pep Boys, since Bendix no longer makes them. The third hose is the rear one, which Iíll replace in the Spring. The bearings are Federal Mogul pieces. The rotors are Bendix pieces, as are the pads. The Help! Dust caps ended up not fitting, so I reused the old ones. Not visible is the Valvoline synthetic grease I used to pack the bearings, and high-temp,. anti-seize lubricant for the screws.
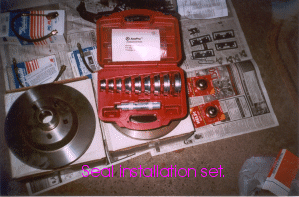
Image 7: Although I work in a machine shop and couldíve made a seal installation kit of some sort, I decided to cough up $52.99, plus tax, U.S. for this premium kit from Ampro. If you do regular maintenance on your vehicles, a kit like this will pay for itself in no time. Iíve ruined plenty of seals in my time using backyard methods of seal installation, so this kit should come in handy, as well as prevent future disasters.
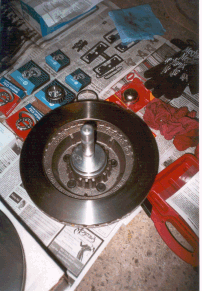
Image 8: Use a soft blow hammer and the seal installer to install the new inner seal; make sure it seats properly.
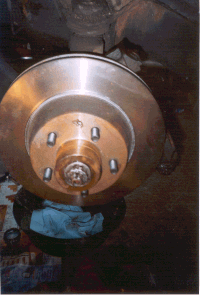
Image 9: Hereís the new rotor, with bearings and seal installed. Make sure the bearing grease goes through the bearing; it should squirt out the little end from the big end. The races are already installed in the rotor. The washer and castle nut go on now. My method of seating the bearings is to tighten the castle nut, while spinning the rotor, until the rotor drags. Then back off ľ turn. Now repeat that method, then install the cage for the nut and the cotter pin. Now install the dust cap.
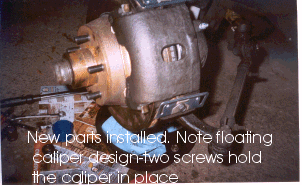
Image 10: Hereís the new caliper installed. Place the large brake pad on the bracket first, then place the caliper with the small pad on the caliper. My new brake lines went on OK. They are NOT of the banjo type (fittings). The line fittings go directly into the caliper.
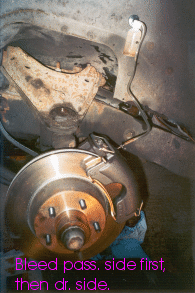
Image 11: This shows the new parts installed, and the brake bleeder kit used. A bleeder kit can be made at home on the cheap, but I decided to buy this one Ďcause it has different sized fittings for various bleeder screws. Bleed the pass. side first, then the dr. side. Use the new DOT 3 or DOT 5 synthetic fluid.
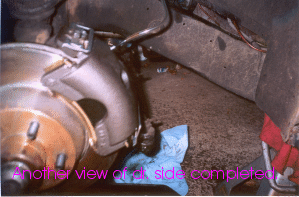
Image 12: Another view of the dr. side completed.
Conclusion: The new front brakes on my í78 NYB have performed flawlessly. No more pull, no more clunks, etc. They should last at least another 30K mi. w/o further service The job cost about $350, plus NY state tax. At a shop, it wouldíve run $600+.
Price List:
| Front brake hoses | $22.99 |
| Rear brake hose | $38.40 |
| Calipers | $18.19ea |
| Rotors | $83.33ea |
| Hardware Kit | $6.85 |
| Inner bearings | $10.24ea |
| Outer bearings | $10.24ea |
| Flare nut wrench set | $9.99 |
| Seals | $4.88ea |