It is my hope that this page will help the reader to understand the components and operation of the Power Window Regulator Motors that were used in the 1974 through 1978 Chrysler cars and possibly other vehicles.
All the parts described in this article can be purchased from aftermarket parts suppliers.
Remove the two little wood grain inserts from the ends of the pull strap on
the upper part of the door. Use a flat screwdriver to pry them out from the
outboard ends.
Remove the two screws that hold the pull strap on.
Using a large blade flat screwdriver (or the correct door panel removal
tool) locate the two metal clips that hold the bottom edge of the upper door
panel to the door, one in front, one in rear. Pry these out. Be carefeul to pry only on the clip
because if you pry on the door panel material you may tear the clip from the
door panel. The metal clips should stay with the door panel. If you do
tear that clip out, all is not lost...deal with it later.
Remove the two small bolts that hold the wood gran door handle on. Use a
large screwdriver to wedge the door handle open while you remove these two
bolts.
Using a large blade flat screwdriver (or the correct door panel removal
tool) locate all the little metal clips along the front, rear, and bottom
endges of the door panel. Remove all these clips as described above.
If this is the driver's door, remove the ring that holds the remote mirror
control to the door panel and push the control down into the door panel.
This ring just threads on. Needle nosed pliers often are helpful here if
the ring is more than finger tight, which it needed not ever be.
If the regulator is in this position, there will be maximum tension on the spring. You don't want to try to remove the spring in this position.
Once you've reduced the tension on the spring all you can, you can just pry up the end of the spring and it'll come off the regulator. The spring will jump a little when it comes off so you might want to hold it with locking pliers or something.
Bolt the motor to the regulator using the three bolts you took out previously.
To replace the spring. Connect power to the motor so you can run it through its travel. Move the regulator the to farthest UP position(if it isn't there already). Place the center of spring onto the slotted stud. Clamp your locking pliers onto the spring near the hook on the end and pull it over the other stud. You can check your work by running the motor through its travel again.
Installing the regulator into the door...
This is basically the reverse order of the removal steps above.
I find that moving the regulator to just a little below the down position helps make it a better shape to fit in through that slot in the door.
Slide the long track (the one that was screwed to the bottom of the glass) onto the outboard regulator guide wheels.
Screw the long track onto the glass again.
Slide the short track onto the inboard regulator guide wheel.
Bolt the short track back onto the inner door skin. This will be adjusted later.
align the stud that is on the motor with the correct hole in the door skin and put the nut on it.
I'll usually connect the power at this point so I can move the glass up and down a little to help me align the other screws.
Remember, never tighten all fasteners until they are all in.
Where you drilled out the three rivets, you'll need to install three small machine screws with nuts and washers. Make sure they are short enough that they don't interfere with the regulator and they don't protrude out to the door panel.
Install the door panel in reverse order of removal as noted aove.
Removing the rear window motors is a snap compared to the fronts. The motor bolts right to the door skin rather than to the regulator like the front door motor. Simply remove the three bolts that hold the motor on the door skin and it will fall out. Disconnect the electrical connector and you are ready to remove the motor for servicing.
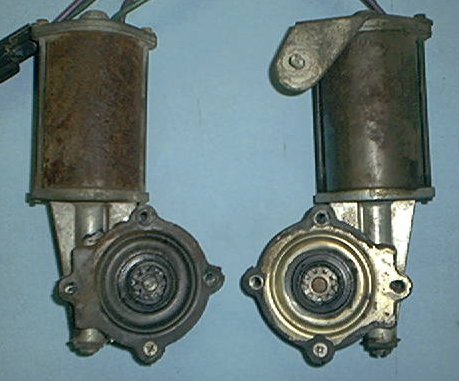
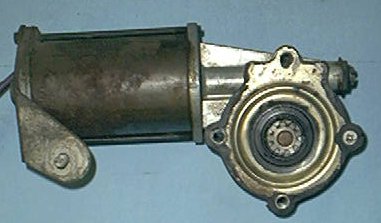
The power window regulator motors used in 1974 through 1978 Chryslers are all the same. There are two varieties however. These differ only between right and left side of the car. You can see the two compared here
You may notice that a good way to remember which is which is that the motor for the left side of the car makes a sort of "L" when placed on the bench with the gear head at the bottom and the pinion toward you.
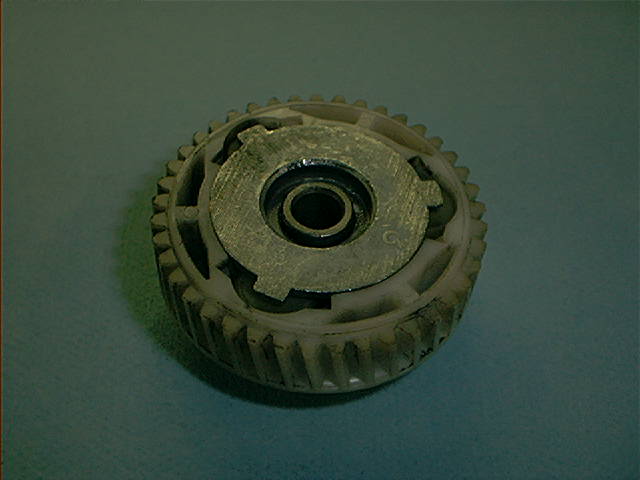
In my experience, the most common failure with the power window motor itself actually lies in the gear head and not the motor itself. The motor and gear head are one assembly but the gear head can easily be serviced independant of the motor portion. Once the cover is removed, you can see that the gear head is made up of four parts.
Motor Pinion
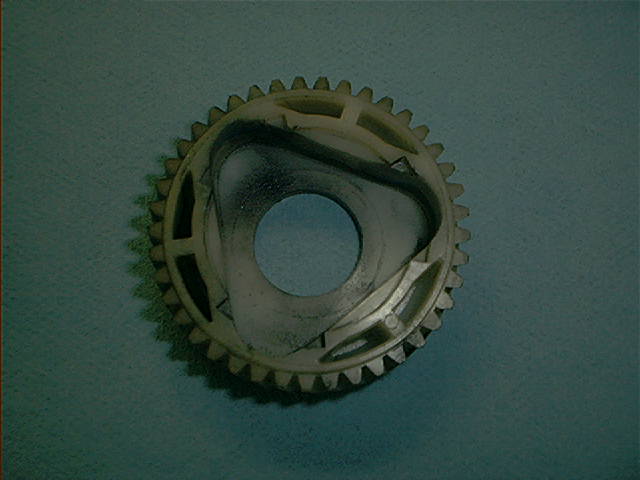
Gear
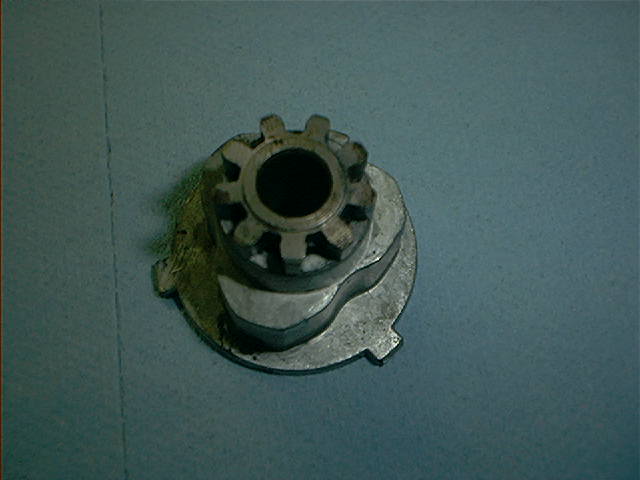
Pinion
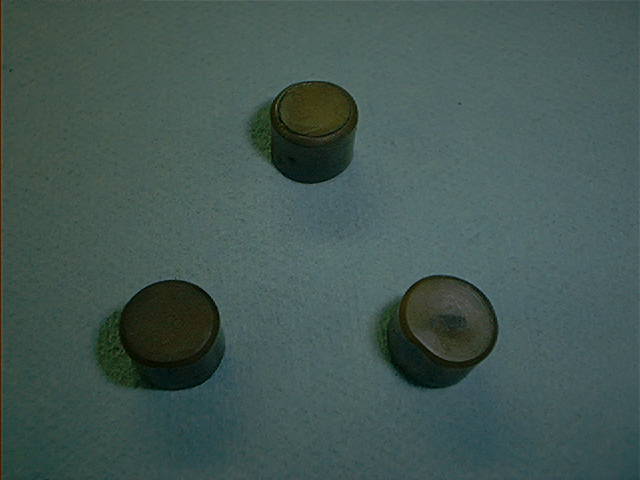
Clutch Disks
I don't know if these are the correct terms for the parts but until such time as I am corrected, this is what I will call the parts in this document.
The three little plastic plugs (referred to as clutch disks on the NYB site) are a Dorman/Motormite part # 74410 identified as Ford window regulator gear plugs.
For a guide channel roller repair, I have used Dorman/Motormite part # 74402 identified as Ford window roller. These have a threaded shaft (1/4x20) requiring a nut to retain. Chrysler original roller has the shaft through a hole on the regulator arm which is mashed at the end as though it were a style of rivet. I used a Dremel tool to grind off the mashed part so that the shaft may be removed. I then made the hole 1/4 inch diameter and installed the # 74402. Note that the Chrysler original part is a roller while the Dorman part is a slide. I filed the slide to fit in the guide channel. Grease everything well and assemble. It worked for me.
I hope you find this info useful.
Ed Byrn
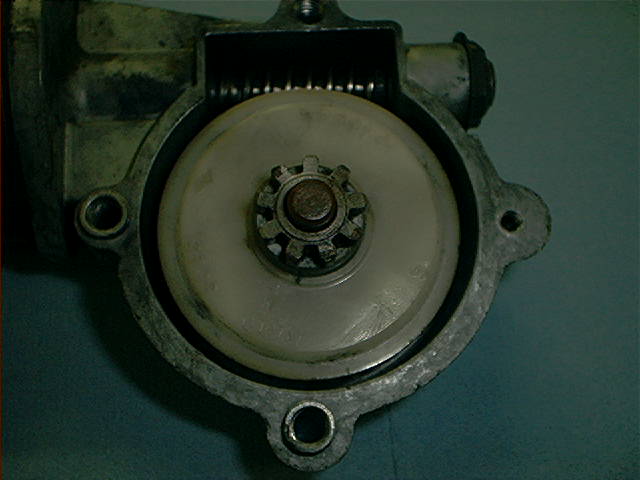
To disassemble the gear head, remove the motor from the door by removing three small bolts using a 3/8" socket. Remove the one small remaining screw that sits flush on the face of the gear head.
Inside you will see the large gear and small pinion mounted atop the large gear.
You can then pull out that gear/pinion assembly. The pinion may not come out with the gear so you may have to pull it out after taking the gear out. These parts are not held in there by anything but grease so just pull them out. I use a flat blade screw driver to pry on the edge of the gear but you must be careful doing this so as not to damage the gear.
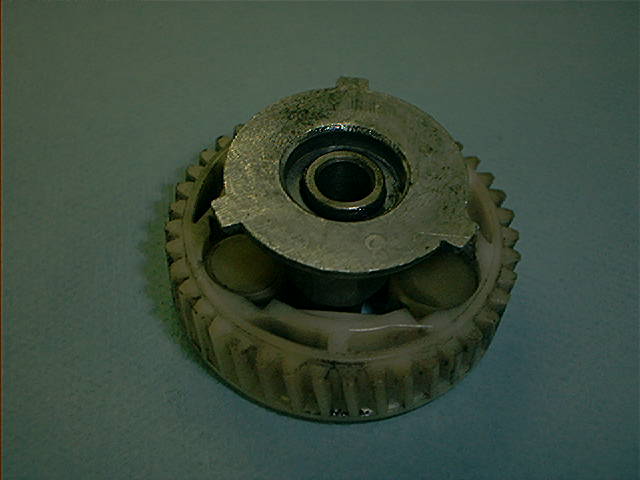
Turn the gear/pinion over and you can see how the pinion comes out. The pictures show this all without grease for clarity. You will want to grease these parts when you reassemble the gear head.
With the pinion removed, you can see those pesky little clutch disks. You may not actually see them there because they may have already disintegrated.
Go ahead and clean up all these parts as well as the gear head housing itself.
After everything is cleaned with solvent and dried with compressed air, go ahead and reassemble the gear head. If you need to replace any parts, have the replacement parts handy and proceed as follows.
Set the gear head upside-down on the bench and place a small dab of grease in each of the places where the disks sit. This grease will hold those disks in while you assemble the gear/pinion assembly.
Place the disks back in the bottom side of the gear.
Place a little more grease in there and then insert the pinion into the gear, aligning the clutch disks with the flat areas on the pinion shaft.
Press it all in together until it is flat on the bottom.
Put some grease inside the pinion where it sits on the shaft. Also, smear some grease into the gear teeth of the large gear.
Place some grease in the gearhed, around the motor's pinion shaft. Fill that area up around that worm gear. There is a bushing at the end that needs to be lubricated too so there needs to be grease in there.
Insert the gear/pinion assembly back into the gear head housing.
Place the cover back on the gear head housing and insert the one small screw that holds it on.
Install the motor in the car.